
Reviewed · PHOTOGRAPHY SESSIONS
Unique Photo Tour and Workshop in Rome Dusk to Dawn
Rome at night is a different city. This dusk-to-dawn Rome night photo workshop helps you shoot moody, low-crowd landmarks with a pro’s guidance, not trial-and-error. I like that it blends long-exposure practice with real-world street shooting so you understand what your camera is doing, not just what to press.
Two things I really like: the small group size (max 4) for patient, close coaching, and the focus on settings like ISO, shutter speed, aperture, and white balance. One thing to consider: it starts at 10:00 pm, and it requires good weather, so you’ll want to dress for a long night and be ready for a late finish.
In This Review
- Quick Hits
- Dusk to Dawn in Rome: Why the Timing Changes Everything
- Small Group, Private Transport: Getting Real Help Instead of Waiting Your Turn
- The Core Skill Set: What You’ll Practice Beyond Auto Mode
- How Rome Light Evolves: From Night to Blue Hour to Sunrise
- Piazza del Campidoglio After Dark: Setting Up Your Shot Plan
- Pantheon at Night: Learning Light Balance in a Hard Lighting World
- Piazza Navona: Framing a Night Scene With Foreground and Layering
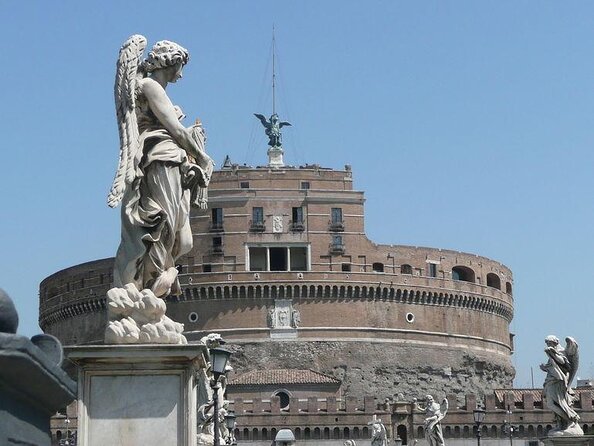
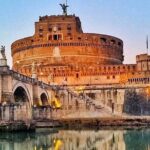
- Museo Nazionale di Castel Sant’Angelo: Practice Control, Not Luck
- St. Peter’s Square: Blue Hour Atmosphere and Dawn-Level Focus
- Teatro di Marcello and Piazza Venezia: Texture, Angles, and Strong Shapes
- Isola Tiberina and Rione Parione: Shooting With Movement in Mind
- Tempio di Vesta: Golden Light Practice Without Losing the Night Mood
- Terme di Caracalla and Fontana di Trevi: Finishing With a Strong Visual Set
- Gear and Camera Rental: What If You Don’t Own the Right Setup?
- Who This Workshop Fits Best (And Who Might Prefer a Different Night Tour)
- After the Shoot: Optional Photo Review for Better Results Next Time
- Should You Book Dusk to Dawn Night Photo Workshop?
- FAQ
- What time does the Rome Dusk to Dawn photo workshop start?
- Where do I meet for the tour?
- Is hotel pickup available?
- How long is the experience?
- How big is the group?
- What language is the workshop in?
- What’s included in the price?
- Can I rent a camera and tripod if I don’t have one?
- Is there an optional photo review after the tour?
- What happens if the weather is bad, or I need to cancel?
Quick Hits
- No-heat-no-crowds pacing with night shooting that keeps Rome calmer than daytime sightseeing
- Hands-on instruction for manual mode, ISO control, white balance, and long exposures
- Tripod-to-shot coaching with feedback as you frame and shoot, not after the fact
- Private transportation between stops so you spend more time photographing and less time hustling
- Blue hour to sunrise practice so you learn how the light shifts minute by minute
- Optional image review afterward if you want extra critique and next steps
Dusk to Dawn in Rome: Why the Timing Changes Everything
This workshop isn’t just “take photos at night.” The whole point is timing—Rome’s light evolves fast, and the session is designed to help you learn that progression. You’ll work from night into blue hour, then up toward golden sunrise, with shooting practice built around what changes in your frame.
That matters because nighttime photography isn’t only about darkness. You’re balancing mixed light sources, keeping details sharp during long exposures, and adjusting your camera as the scene brightens. By the time dawn arrives, you’re not stuck guessing—you know how to respond.
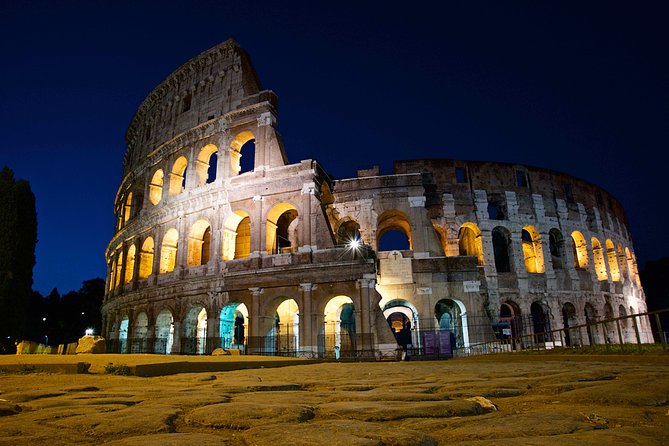
And you get a bonus benefit: you’re shooting when most visitors aren’t out competing for angles. The promise here is quieter landmarks, including the idea of getting deserted views like the Colosseum under moonlight and again as morning arrives.
Worth a look next to this Rome booking:
- Rome: Explore the City by Vespa with an Optional Photoshoot
★ 5.0 · 1,103 reviews - Rome Vespa Scooter Tour with Professional Photographer
★ 5.0 · 857 reviews - Rome: Vespa Ride with Pictures and Sweet Tastings
★ 5.0 · 723 reviews - Rome: Photoshoot Service with Vintage Fiat 500
★ 5.0 · 611 reviews
Small Group, Private Transport: Getting Real Help Instead of Waiting Your Turn
With a max group of four, you’re not fighting for attention. In a setup like this, camera settings can’t be explained like a slideshow—you learn by doing, and a small group makes it easier to troubleshoot your tripod placement, framing, and exposure choices right when you need them.
Private transportation also changes the feel of the night. You can move between stops without burning energy on long transfers, and you’re more likely to arrive ready to shoot rather than stressed about getting there. For a 7-hour session, that comfort is more than a perk—it’s part of the value.
The guide behind the experience is Giulio D’Ercole (RomePhotoFuntours), and the overall vibe from past participants is that he’s patient and focused. That patience matters a lot when you’re learning manual exposure in real time with changing light.
The Core Skill Set: What You’ll Practice Beyond Auto Mode
This workshop is structured like a nighttime photo training session, not a casual walk. You’ll practice the classic night challenges: long exposures, controlling light balance, and using both natural and artificial light to your advantage.
You’ll also get hands-on guidance on the exact knobs that control results:
- Manual mode and when to use it
- ISO control (so you don’t just crank sensitivity and hope)
- White balance (to handle warm street lights vs cooler sky light)
- Aperture and shutter speed (to control sharpness, star-like highlights, and exposure)
For composition, you’ll practice proven framing ideas: leading lines, symmetry, foreground interest, and layering. The guide will also work with you on your camera setup—starting with the tripod and moving through the shot execution—so you learn how to build an image step by step.
This is ideal if you’re already comfortable taking photos but you want more control. If you’re truly brand new, you might pick things up quickly, but you’ll get the best results if you can at least understand what ISO, shutter speed, and aperture do.
How Rome Light Evolves: From Night to Blue Hour to Sunrise
A big part of the experience is learning light timing, not just memorizing settings. The session is built around how light evolves: the darkness of night, the soft shift of blue hour, and then the first warmth of golden sunrise.
That training helps because exposure settings don’t stay fixed. As the sky brightens, your long exposures get shorter, your highlights shift, and the “correct” white balance often changes too. When you know why those shifts happen, you can repeat better results later on your own.
You’re also learning how to spot moments where the light makes the same location look completely different. In Rome, that’s half the magic—one angle can give you a moody night shot and then a cleaner, brighter version within the same session.
Worth a look next to this Rome booking:

Piazza del Campidoglio After Dark: Setting Up Your Shot Plan
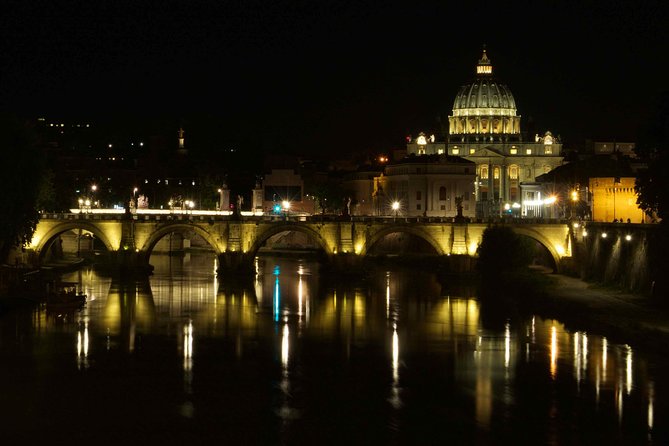
You start with Piazza del Campidoglio, a strong place to learn how to frame at night. Even before the “big dawn” moments, early stops are where you build habits: tripod setup, test shots, and deciding what you want the image to emphasize.
This is also a good moment to practice composition basics under low light. Think about symmetry and alignment, then add foreground interest so your photo has depth instead of feeling like a flat exposure. Night photos can easily turn into glowing blobs—this kind of coaching helps you avoid that.
A practical consideration: early in the evening your settings may feel awkward. That’s normal. The value is that you’re learning the workflow while you still have time to adjust and improve.
Pantheon at Night: Learning Light Balance in a Hard Lighting World
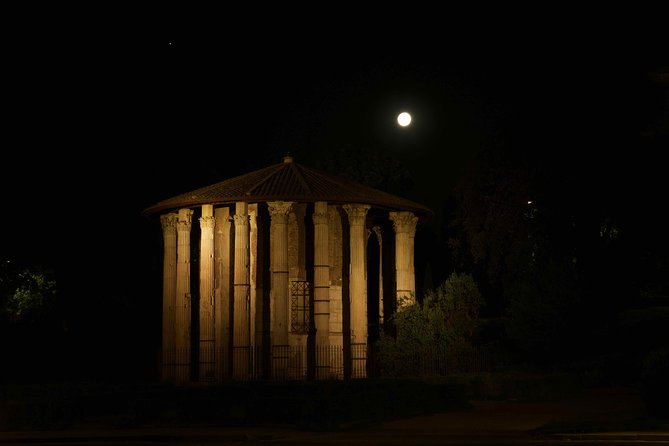
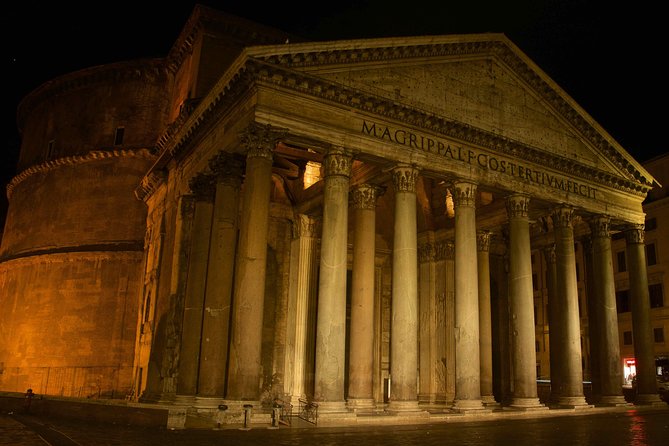
Next up is the Pantheon. This stop is useful for night photography because it pushes you to think about light balance—how strong light sources affect exposure and how the darker areas need their own strategy.
This is where understanding white balance can make a huge difference. Warm lights can tint the whole scene, while your sky tone changes as time passes. If you’ve ever shot a night scene that looked great on-screen but turned weird in the final result, this is the kind of problem the workshop trains you to handle.
You’ll also practice long exposure thinking: what will blur (people, moving elements) and what you want to remain crisp. The goal isn’t perfection—it’s understanding the trade-offs so you can choose the look you want.
Piazza Navona: Framing a Night Scene With Foreground and Layering
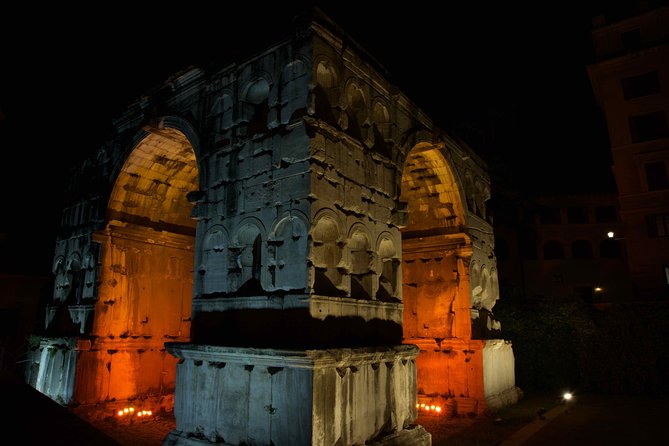
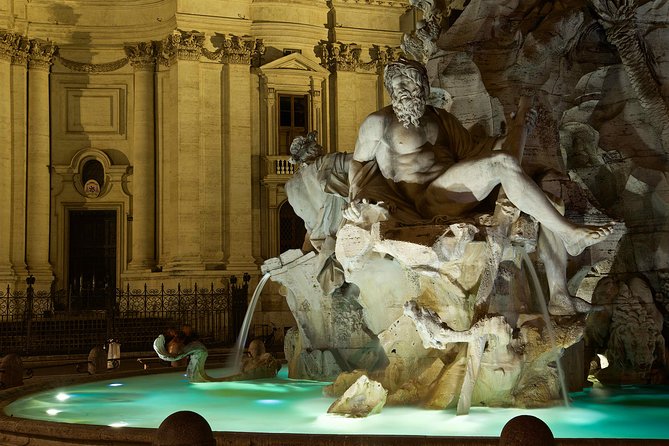
At Piazza Navona, you’ll work on how to build a photo with layers. Night scenes often get chaotic fast, especially in bright areas, so the composition guidance here is key.
Use foreground interest to give your frame a sense of place, then bring in layering so the bright parts don’t overpower everything. Leading lines help, but at night they also help you control attention—where the viewer’s eye lands first, and where it travels next.
A downside you should plan for: open squares can attract more foot traffic even at night. The workshop’s timing is meant to reduce crowd pressure, but you’ll still benefit from being ready to shoot quickly once you get a clean moment.
Museo Nazionale di Castel Sant’Angelo: Practice Control, Not Luck
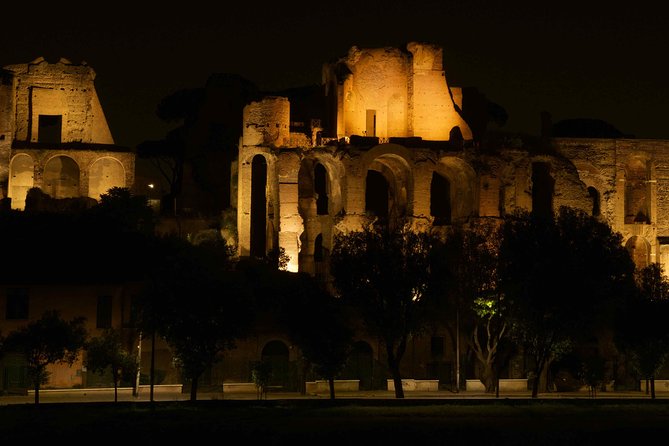
The Museo Nazionale di Castel Sant’Angelo stop is a useful “skills check” moment. By now, you should be more comfortable with your tripod routine and your exposure workflow. This is where you can test whether you can repeat a good setup without falling back into random settings.
Because you’re moving through a range of lighting conditions, you’re learning how to respond. If your shot looks too bright, you adjust shutter speed and/or ISO. If it looks too warm, you tweak white balance. If details are missing, you rethink aperture choices. The coaching approach here is what makes the practice stick.
If you’re bringing your own camera gear, make sure your tripod is stable and your setup is consistent. Night photography punishes sloppiness.
St. Peter’s Square: Blue Hour Atmosphere and Dawn-Level Focus
You’ll reach St. Peter’s Square as the light shifts. This stop is where the dusk-to-dawn idea really pays off, because blue hour and early dawn tend to create a calmer, more cinematic feel than pure darkness.
The practical value: you’ll learn how to keep your exposure under control as the sky brightens. Long exposures become more manageable, and highlights can start to “behave” differently. If you’ve ever struggled with night photos that get washed out near morning, this is the moment where you learn the fix.
This is also where composition becomes more than theory. Symmetry, leading lines, and layering can create a stronger sense of balance when the light is changing fast. You’ll shoot while you can still adjust rather than waiting until the moment is gone.
Teatro di Marcello and Piazza Venezia: Texture, Angles, and Strong Shapes
After St. Peter’s Square, you move into Teatro di Marcello and then Piazza Venezia. These stops are ideal for learning how to photograph structure—how to emphasize shapes and texture when the light is low.
At night, textures can disappear if your exposure is off, but they can also look dramatic if you nail the balance. The workshop’s approach trains you to make that balance intentionally rather than hoping the camera grabs it for you.
Piazza Venezia can also be a useful place to practice dealing with brighter areas. Mixed lighting is a night photographer’s constant problem, and these scenes let you practice white balance and exposure control in real conditions.
Isola Tiberina and Rione Parione: Shooting With Movement in Mind
You’ll photograph Isola Tiberina and then Rione Parione. Water and city edges often bring more reflections and more potential movement, which changes how you plan a long exposure.
This is a good time to focus on what you want to include. Do you want a smoother look with movement softened? Or do you want people to appear more distinct? Night photography is partly artistic choice, and the instruction helps you make that choice with your camera settings rather than guessing.
Also, narrow streets and nearby corners can force you to work fast with framing. That’s where foreground interest and layering can save your shot from looking empty or too generic.
Tempio di Vesta: Golden Light Practice Without Losing the Night Mood
At Tempio di Vesta, you’ll be working closer to dawn. This is a great moment to learn how to keep a night-like mood while the scene brightens.
You’ll adjust your technique as the sky becomes less dark, and you’ll practice composition changes too. As light rises, your image can gain clarity—but it can also lose the dramatic contrast you liked earlier. The workshop trains you to capture that transition rather than forcing one style.
If you’ve been stuck with “either it’s night and too dark, or it’s dawn and too flat,” this kind of practice helps you bridge the two looks.
Terme di Caracalla and Fontana di Trevi: Finishing With a Strong Visual Set
The later portion includes Terme di Caracalla and ends at Fontana di Trevi. These are valuable stops for finishing your set of images with variety: texture and scale earlier, then a bright landmark finale that often looks great when you manage exposure and highlights carefully.
Fontana di Trevi at this stage of the night is a real test of your learned skills. Bright details can blow out if you overexpose, and mixed light can shift your color tone quickly as sunrise approaches. The coaching you received earlier is what helps you nail the last images without falling into old habits.
One more practical point: by this time, fatigue is real. The workshop’s structure—private transport, focused coaching, and short “go shoot” targets—helps you keep momentum even when the body is tired.
Gear and Camera Rental: What If You Don’t Own the Right Setup?
You don’t have to show up with a pro kit, but you do need to be ready to shoot. If you have no camera, you can rent Nikon gear plus tripods for 50 euros per kit, paid in cash.
If you do bring your own equipment, plan for a tripod-ready workflow. Night photography rewards stability, and this workshop teaches tripod setup and execution as part of the process. Even a small shake can turn a clean long exposure into a blurry disappointment.
Also bring the patience to do test shots. Night photography is not a one-click magic trick—it’s a repeat-and-adjust skill.
Who This Workshop Fits Best (And Who Might Prefer a Different Night Tour)
This is a strong match for intermediate enthusiasts and passionate beginners who want to move beyond auto mode. If you enjoy learning how settings work and you’re willing to practice repeatedly as the light changes, you’ll leave with sharper skills and a more coherent portfolio of images.
It also fits well if you want Rome without daytime crowd pressure and you like the idea of shooting iconic places with a calmer atmosphere. The “no heat, no crowds” concept shows up in the pacing and the emphasis on night timing.
If you hate late start times, or you’re only interested in casual sightseeing photos, this may feel like homework. This is a photo workshop first, a tour second.
After the Shoot: Optional Photo Review for Better Results Next Time
There’s an optional photo review where you can submit your images afterward for detailed critique and tips for improvement. If you want to speed up your learning curve, this is the kind of feedback loop that helps you progress quickly.
Even without the review, the structure of the session is meant to teach you a repeatable method: choose a composition, set the camera intentionally, shoot with intention, then adjust as the light changes.
If you’re building skills for future trips, the review option makes that learning stick even more.
Should You Book Dusk to Dawn Night Photo Workshop?
Book it if you want a real night photography education in Rome—hands-on coaching, manual mode practice, and a route timed for night-to-sunrise light changes. The max-four group and private transport also help the experience stay focused, not chaotic.
Skip it if you want a relaxed, daytime-style tour where you don’t care about settings. The payoff here comes from participating in the shooting process, not just watching Rome go by.
If you’re willing to plan for a long night and you want images that look like Rome at its most atmospheric, this is one of the better ways to spend your time.
FAQ
What time does the Rome Dusk to Dawn photo workshop start?
It starts at 10:00 pm. The activity ends back at the meeting point.
Where do I meet for the tour?
You meet at the entrance of Castel Sant’Angelo, opposite the Bridge of Angels on Lungotevere Castello, 50, 00193 Roma RM, Italy.
Is hotel pickup available?
Yes, pickup is offered upon request at your hotel, Airbnb, or home. Otherwise, you meet at Castel Sant’Angelo as described above.
How long is the experience?
The duration is about 7 hours.
How big is the group?
This workshop is limited to a maximum of four people.
What language is the workshop in?
The experience is offered in English.
What’s included in the price?
Included are private transportation and a professional photographer guide.
Can I rent a camera and tripod if I don’t have one?
Yes. If you have no camera, you can rent Nikon gear plus tripods for 50 euros per kit, payable in cash.
Is there an optional photo review after the tour?
Yes. You can submit your images afterward for detailed critique and tips for improvement.
What happens if the weather is bad, or I need to cancel?
The experience requires good weather. If it’s canceled due to poor weather, you’ll be offered a different date or a full refund. Free cancellation is available up to 24 hours in advance for a full refund.
More Photography Sessions in Rome
- Rome: Explore the City by Vespa with an Optional Photoshoot
★ 5.0 · 1,103 reviews - Rome Vespa Scooter Tour with Professional Photographer
★ 5.0 · 857 reviews - Rome: Vespa Ride with Pictures and Sweet Tastings
★ 5.0 · 723 reviews - Rome: Photoshoot Service with Vintage Fiat 500
★ 5.0 · 611 reviews - Rome: Personalized Photoshoot outside the Colosseum
★ 5.0 · 526 reviews - Rome: Pro Photoshoot include free transport with VESPA
★ 5.0 · 501 reviews
More Tours in Rome
- Vatican Museums, Sistine Chapel & St. Peter’s Basilica Tour
★ 4.3 · 73,970 reviews - Vatican Museums, Sistine Chapel & St Peter’s Basilica Guided Tour
★ 4.5 · 39,149 reviews - Rome: Colosseum, Palatine Hill and Roman Forum Guided Tour
★ 4.8 · 32,814 reviews - Rome: Guided Tour of Colosseum, Roman Forum & Palatine Hill
★ 4.7 · 27,897 reviews - Rome: Colosseum, Roman Forum and Palatine Hill Guided Tour
★ 4.5 · 23,903 reviews - Rome: Colosseum Arena Floor, Palatine & Forum Guided Tour
★ 4.5 · 20,180 reviews
More Tour Reviews in Rome
- Vatican Museums, Sistine Chapel & St. Peter’s Basilica Tour
★ 4.3 · 73,970 reviews - Vatican Museums, Sistine Chapel & St Peter’s Basilica Guided Tour
★ 4.5 · 39,149 reviews - Rome: Colosseum, Palatine Hill and Roman Forum Guided Tour
★ 4.8 · 32,814 reviews - Rome: Guided Tour of Colosseum, Roman Forum & Palatine Hill
★ 4.7 · 27,897 reviews - Rome: Colosseum & Forum with Audio Guide App -Optional Arena
★ 4.2 · 24,770 reviews - Rome: Colosseum, Roman Forum and Palatine Hill Guided Tour
★ 4.5 · 23,903 reviews
Just added to our Rome reviews

Photography Sessions, compared.
 ★ 5.0Explore the City by Vespa with an Optional PhotoshootFrom $371,103 reviews
 ★ 5.0Rome Vespa Scooter Tour with Professional PhotographerFrom $66857 reviews
 ★ 5.0Vespa Ride with Pictures and Sweet TastingsFrom $34723 reviews
 ★ 5.0Photoshoot Service with Vintage Fiat 500From $73611 reviews
 ★ 5.0Personalized Photoshoot outside the ColosseumFrom $53526 reviews
Pro Photoshoot include free transport with VESPAFrom $33501 reviews
 ★ 4.9Professional Photoshoot in RomeFrom $40452 reviews
 ★ 5.0Vespa Photo Tour with Historic City HighlightsFrom $33395 reviews
Browse the lists this tour appears in