
Reviewed · PHOTOGRAPHY SESSIONS
Rome, Private Photography Guided Tour – Capture Iconic Sights
Rome can feel like one big postcard, but a photo walk turns it into a series of choices. I love how this tour is built around real camera practice (not just sightseeing talk), and I also love that you can steer the route toward what you personally want to shoot. The guide, Antonio, is a photojournalist type who focuses on where you stand and when the light helps. One consideration: you’ll need to bring your own camera gear, including a tripod or monopod if you want low-light shots.
This is also a good fit if you’re traveling with non-photographers. You’ll still get stops that make sense for everyone, while you get the hands-on guidance to translate what you see into images. Just note: it’s walking-heavy, and there’s no hotel pickup or drop-off—so you’ll want to arrive ready to move.
In This Review
- Key details that matter before you go
- Private Photography Guided Tour in Rome: what it’s really like
- Meeting at Largo di Torre Argentina: the easiest start point
- How the route works: Foro Romano vs. Vatican-area highlights
- Foro Romano-focused walking photo loop
- Vatican-area-focused walking photo loop
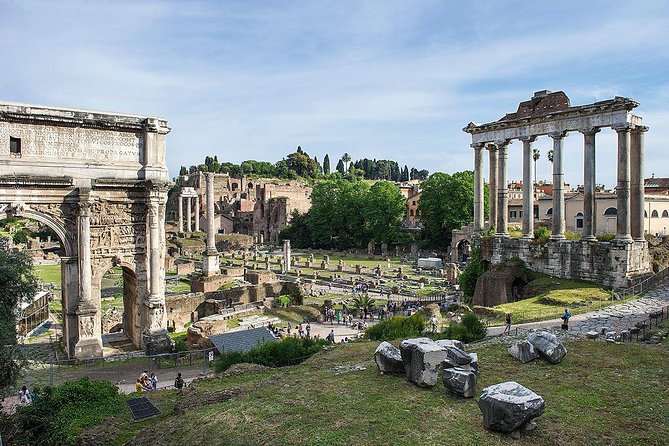
- Stop 1: Foro Romano and the Colosseum zone (shoot like you mean it)
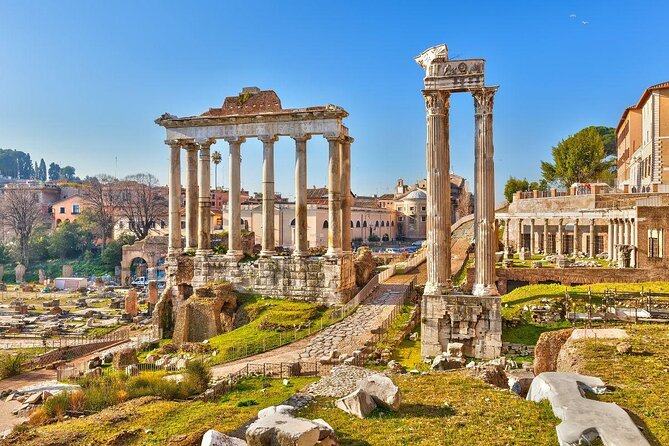
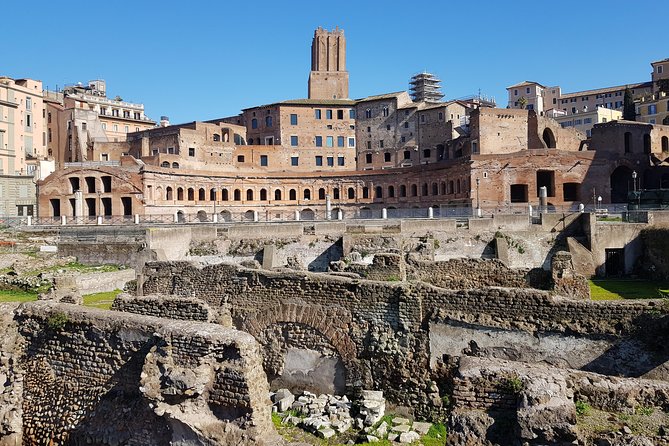
- What makes Foro Romano special for photos
- One practical consideration
- Stop 2: Pantheon, Piazza Navona, Castel Sant’Angelo, and Vatican views
- Why this works for photographers (even if you’re not a pro)
- A note on entrance expectations
- The photo coaching: what you’ll actually practice on the streets
- Gear you should bring (and what to pack first)
- Packing tip that saves you time
- Who this tour suits best
- Price and value: is $216.27 worth it?
- Quick practical tips to get the most out of it
- Should you book this private Rome photo tour?
- FAQ
- Is this a private tour?
- How long is the Rome photography guided tour?
- Where does the tour start?
- What language is the tour offered in?
- Do I need to bring my own camera?
- Do I need a tripod?
- Are entrance fees included?
- Is transportation or hotel pickup included?
- Are non-photographers welcome to join?
- What is the cancellation policy?
Key details that matter before you go
- Private group focus: only your group joins, so you can ask questions and adjust the pace.
- Antonio’s timing + angles: expect guidance on where to be and when to shoot for better light.
- Bring-your-own gear: your camera, extra batteries, and walking shoes are part of the deal.
- Tripod or monopod helps: especially for night photography or low-light situations.
- Route can be customized: the plan can shift to match your shot list.
- Two photo themes: one route centers on Foro Romano/Colosseum; another centers on Vatican-area sights and city icons.
Private Photography Guided Tour in Rome: what it’s really like
A normal tour in Rome gets you from point A to point B. This one gets you from idea to frame. The difference is the guide’s mindset: not just explaining monuments, but helping you make images that look like you understood them.
The tour runs about 3 hours and stays English-friendly with a professional photographer guide. You’ll start at Largo di Torre Argentina, 7, 00186 Roma RM, Italy and end back at the same meeting point. That loop matters because it keeps the logistics simple. You’re not constantly re-routing by bus or taxi; you’re walking, stopping, shooting, and walking again.
And yes, you can bring friends who don’t care about photography. The tour is built so they can enjoy the walking and the history context you’ll hear along the way, while you handle the camera work.
Worth a look next to this Rome booking:
- Vatican Museums, Sistine Chapel & St Peter’s Basilica Guided Tour
★ 4.5 · 39,149 reviews - Rome: Colosseum, Palatine Hill and Roman Forum Guided Tour
★ 4.8 · 32,814 reviews - Rome: Guided Tour of Colosseum, Roman Forum & Palatine Hill
★ 4.7 · 27,897 reviews - Rome: Colosseum & Forum with Audio Guide App -Optional Arena
★ 4.2 · 24,770 reviews
Meeting at Largo di Torre Argentina: the easiest start point
The meeting point is right in a very walkable area, near public transportation, so it’s easier to arrive without over-planning your morning or afternoon. Largo di Torre Argentina is also a useful “starting lens” location. From here, Rome’s layers show up fast: older ruins, street-level city life, and the big monuments that pull your eyes forward.
If you’re the sort of person who likes to be ready before the group starts, do two quick things before you meet:
- Charge your phone or tablet if you use it as a backup.
- Pack your camera so you can pull it out quickly at stops.
You’ll be glad you did. Photo walks are all about catching small moments, like a shift in light across stone or a gap in crowds.
How the route works: Foro Romano vs. Vatican-area highlights
The tour layout is shown as two themed options—one focused on Foro Romano and one focused on Città del Vaticano. In real-world terms, think of it like this: during your ~3 hours, you’ll follow a route that prioritizes those iconic views, and you can adjust it to match your interests.
Here’s what’s explicitly on the plan.
Foro Romano-focused walking photo loop
This one connects several classic Roman sight lines, including:
- Largo di Torre Argentina and the Jewish ghetto area context
- Tiber Island and Capitol Hill views
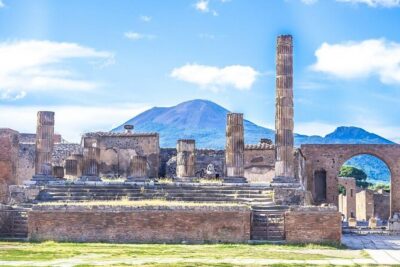
- Roman Forum and the Colosseum area
Admission notes: the plan lists admission ticket not included for this segment. That’s a heads-up if you were hoping the tour fee covers entry to specific interiors. Also, even when entrances aren’t included, you can still build strong images from outside vantage points. Rome’s scale helps you even without going inside.
Worth a look next to this Rome booking:
Vatican-area-focused walking photo loop
This second route includes:
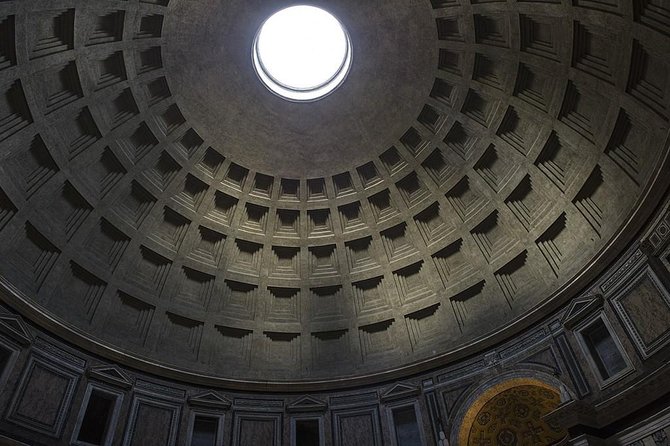
- Pantheon
- Piazza Navona
- Castel Sant’Angelo
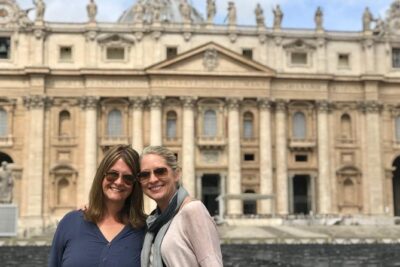
- Vatican City
Admission notes: the plan lists admission ticket free for this segment. Still, treat that as “no ticket fees required for what’s planned,” and confirm what’s meant on the day if you’re unsure whether you’ll be entering anything. Either way, you get a mix of big monuments and very photographable street scenes.
Stop 1: Foro Romano and the Colosseum zone (shoot like you mean it)
If your photography style leans toward architecture—lines, textures, scale—this part of the walk is where Rome starts to feel like a camera manual you can walk through.
You’ll move through a sequence that helps you practice a key skill: changing angles without losing your composition. The stops listed on this theme cover a lot of “layers,” so you can experiment:
- Wide frames to show scale (Forum-to-Colosseum vibes)
- Medium shots that focus on arches and repetition
- Details that use shadows to add depth to stone
What makes Foro Romano special for photos
This area gives you strong geometry. Roman ruins are basically a design problem solved with light. When the guide times stops well, you can capture that moment when the sun turns carvings and edges into a clear 3D surface.
Also, Rome’s history isn’t just a lecture here. The guide’s approach (Antonio’s style is a big reason for the high rating) is to connect what you’re seeing to how you shoot it. People appreciate that because they leave with images that feel intentional, not accidental.
One practical consideration
This is walking. It’s also a busy zone. Even if you aren’t trying to shoot in peak crowds, you might need patience while waiting for an angle with fewer people. The upside is that waiting becomes part of the lesson: you learn how to time your frames and work around movement.
Stop 2: Pantheon, Piazza Navona, Castel Sant’Angelo, and Vatican views
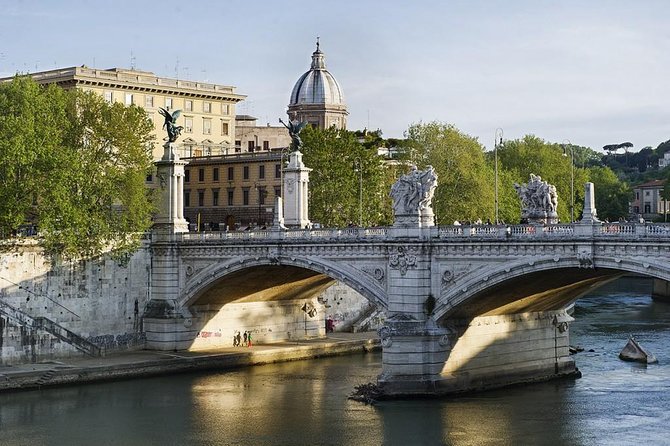
This route gives you more variety. Instead of concentrating mostly on ruins and massive stone masses, you shift into a mix of city icons and skyline photo opportunities.
Why this works for photographers (even if you’re not a pro)
If you’ve ever wondered why some Rome photos look “clean” and others look crowded, this is where you start to get answers. The guide can help you pick vantage points that reduce visual clutter. You might also get composition suggestions like:
- using buildings to frame subjects
- balancing verticals with horizon choices
- watching how people move through the scene so your frame looks calm
Antonio’s guidance is repeatedly praised as practical, especially for English-speaking visitors who want clear instruction. People also highlight how he knows the right places to shoot and how to position you for stronger results.
A note on entrance expectations
The plan says admission ticket free for this theme, so you might not be paying entry fees for what’s covered. Still, don’t assume you’ll go inside any specific building. If you’re hoping for interior shots (like inside major churches), ask ahead of time what’s included in your exact route.
The photo coaching: what you’ll actually practice on the streets
This isn’t just “stand here and take a picture.” The value is in the coaching loop: see, adjust, shoot again.
From the way the guide is described in the feedback, you can expect three coaching types:
- Fundamentals, explained simply: you get patience and clear explanation, even if you’re an amateur.
- Timing for light: Antonio is known for understanding exactly where to be when the light behaves best.
- Composition help while you’re shooting: you’re not stuck waiting until the end for tips.
If you like to photograph buildings, you’ll get help with perspective control and shooting angles. If you like people-in-Rome shots, you’ll still get pacing advice that helps you avoid random-looking frames. Either way, you should leave with a better sense of how to translate what you see into a deliberate photo.
Gear you should bring (and what to pack first)
The tour is built for photographers, so your kit matters. The experience specifically asks you to bring:
- Your personal camera
- A camera backpack
- An assortment of lenses (you choose what fits your style)
- A flash unit (may not be used, but it’s useful)
- Extra batteries
- A tripod or monopod (especially for night/low light)
- Great pair of walking shoes
That list is practical. Rome lighting can change quickly—clouds, sun angles, and nighttime transitions. Extra batteries help when you’re shooting longer than you planned. A tripod/monopod makes low-light shooting more realistic, especially if you’re aiming for steadier frames rather than high ISO noise.
Packing tip that saves you time
If you carry multiple lenses, consider a “swap-ready” setup: keep your likely lens near the top so you’re not rummaging at every stop. Photo walks are short; you want quick access.
Who this tour suits best
This is ideal if you’re:
- an amateur who wants real instruction (not just a route)
- a more experienced photographer who wants better angles and light timing
- traveling with a friend or partner who’s okay with walking and sightseeing while you shoot
- willing to customize your priorities and ask for adjustments on the fly
It’s also a good fit for active travelers because you’ll be walking between major viewpoints. If you’re looking for a slow sit-down tour, you might find this one too mobile.
Price and value: is $216.27 worth it?
At $216.27 per person for a private, pro-guided photo walk, the value comes from what’s included: a professional photographer guide plus a customized tour. The guide’s expertise is the “product” here—help with composition, timing, and shot planning.
You should also factor in what you provide yourself:
- camera gear and tripod/monopod
- your own walking readiness
- no hotel pickup or transportation to/from attractions
- attention to entrance fees (the plan notes admission not included for one theme; free for another)
So it’s not a cheap sightseeing add-on. It’s closer to paying for a hands-on coaching session in one of the most photogenic cities on earth. If you care about improving your photos, this kind of personalized guidance can outperform simply buying a list of must-see stops.
If you’re only interested in a casual stroll with a few pictures on your phone, you may get more value from a standard guided walk. But if you want to leave with images you feel proud of, this price starts to look fair.
Quick practical tips to get the most out of it
A few small choices can make a big difference:
- Bring the tripod/monopod you actually feel like using, not just the one you own.
- Wear shoes that handle lots of walking on real streets.
- If you shoot in low light, plan on using your tripod/monopod rather than forcing handheld shots.
- Keep your camera settings flexible; Rome will give you bright stone and dim corners in the same walk.
Also, ask for customization early. The tour is designed for it, and it helps the guide build stops around your camera style.
Should you book this private Rome photo tour?
Book it if you want more than photos-as-proof. This is for people who want better frames—wider shots with strong composition, cleaner angles, and light timing that makes Roman stone look dimensional. If you’re traveling with someone who isn’t into photography, you’ll still get a meaningful outing without turning it into a private workshop that only benefits you.
Skip it (or compare options) if you’re not bringing a camera seriously, or if you dislike walking and stop-and-go pacing. Also, if your dream is fully indoor, ticketed photo time everywhere, you’ll want to confirm what entrances are actually part of your route since admission is noted differently by theme.
If you’re the kind of person who can’t leave a city without trying to get it right through your lens, this is a strong pick. A good guide can make Rome feel new fast. This one is designed for exactly that.
FAQ
Is this a private tour?
Yes. It’s a private tour/activity, and only your group will participate.
How long is the Rome photography guided tour?
It’s listed as about 3 hours.
Where does the tour start?
The meeting point is Largo di Torre Argentina, 7, 00186 Roma RM, Italy.
What language is the tour offered in?
The tour is offered in English.
Do I need to bring my own camera?
Yes. You must bring your own camera (digital or analog).
Do I need a tripod?
A tripod or monopod is recommended, especially for night photography or low light situations.
Are entrance fees included?
The itinerary notes that admission ticket is not included for the Foro Romano theme. For the Città del Vaticano theme, admission is listed as free.
Is transportation or hotel pickup included?
No. Hotel pickup and drop-off, plus transportation to/from attractions, are not included.
Are non-photographers welcome to join?
Yes. Non-photographer friends and travel companions are welcome.
What is the cancellation policy?
You can cancel for a full refund up to 24 hours in advance of the experience start time. If you cancel less than 24 hours before, the amount paid is not refunded.
More Guided in Rome
- Vatican Museums, Sistine Chapel & St Peter’s Basilica Guided Tour
★ 4.5 · 39,149 reviews - Rome: Colosseum, Palatine Hill and Roman Forum Guided Tour
★ 4.8 · 32,814 reviews - Rome: Guided Tour of Colosseum, Roman Forum & Palatine Hill
★ 4.7 · 27,897 reviews - Rome: Colosseum & Forum with Audio Guide App -Optional Arena
★ 4.2 · 24,770 reviews - Rome: Colosseum, Roman Forum and Palatine Hill Guided Tour
★ 4.5 · 23,903 reviews - Rome: Colosseum Arena Floor, Palatine & Forum Guided Tour
★ 4.5 · 20,180 reviews
More Tours in Rome
- Vatican Museums, Sistine Chapel & St. Peter’s Basilica Tour
★ 4.3 · 73,970 reviews - Vatican Museums, Sistine Chapel & St Peter’s Basilica Guided Tour
★ 4.5 · 39,149 reviews - Rome: Colosseum, Palatine Hill and Roman Forum Guided Tour
★ 4.8 · 32,814 reviews - Rome: Guided Tour of Colosseum, Roman Forum & Palatine Hill
★ 4.7 · 27,897 reviews - Rome: Colosseum, Roman Forum and Palatine Hill Guided Tour
★ 4.5 · 23,903 reviews - Rome: Colosseum Arena Floor, Palatine & Forum Guided Tour
★ 4.5 · 20,180 reviews
More Tour Reviews in Rome
- Vatican Museums, Sistine Chapel & St. Peter’s Basilica Tour
★ 4.3 · 73,970 reviews - Vatican Museums, Sistine Chapel & St Peter’s Basilica Guided Tour
★ 4.5 · 39,149 reviews - Rome: Colosseum, Palatine Hill and Roman Forum Guided Tour
★ 4.8 · 32,814 reviews - Rome: Guided Tour of Colosseum, Roman Forum & Palatine Hill
★ 4.7 · 27,897 reviews - Rome: Colosseum & Forum with Audio Guide App -Optional Arena
★ 4.2 · 24,770 reviews - Rome: Colosseum, Roman Forum and Palatine Hill Guided Tour
★ 4.5 · 23,903 reviews
Just added to our Rome reviews

Photography Sessions, compared.
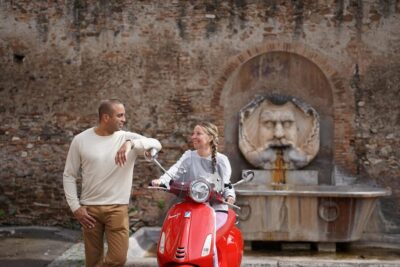 ★ 5.0Explore the City by Vespa with an Optional PhotoshootFrom $371,103 reviews
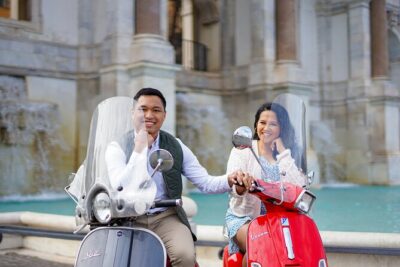 ★ 5.0Rome Vespa Scooter Tour with Professional PhotographerFrom $66857 reviews
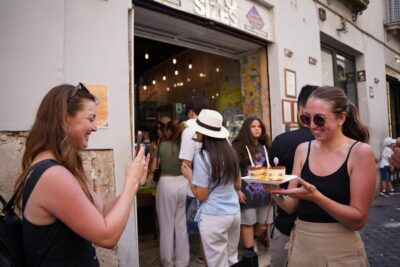 ★ 5.0Vespa Ride with Pictures and Sweet TastingsFrom $34723 reviews
 ★ 5.0Photoshoot Service with Vintage Fiat 500From $73611 reviews
 ★ 5.0Personalized Photoshoot outside the ColosseumFrom $53526 reviews
Pro Photoshoot include free transport with VESPAFrom $33501 reviews
 ★ 4.9Professional Photoshoot in RomeFrom $40452 reviews
 ★ 5.0Vespa Photo Tour with Historic City HighlightsFrom $33395 reviews
Browse the lists this tour appears in